
Experiments / 20 Oct 2026 · 70 min read
Fable… What Happened? Opus vs Fable in Blender
The same thirteen Blender briefs, five setting pairs and very uneven results. Opus and Fable side by side, including where Max went backwards from Extra.
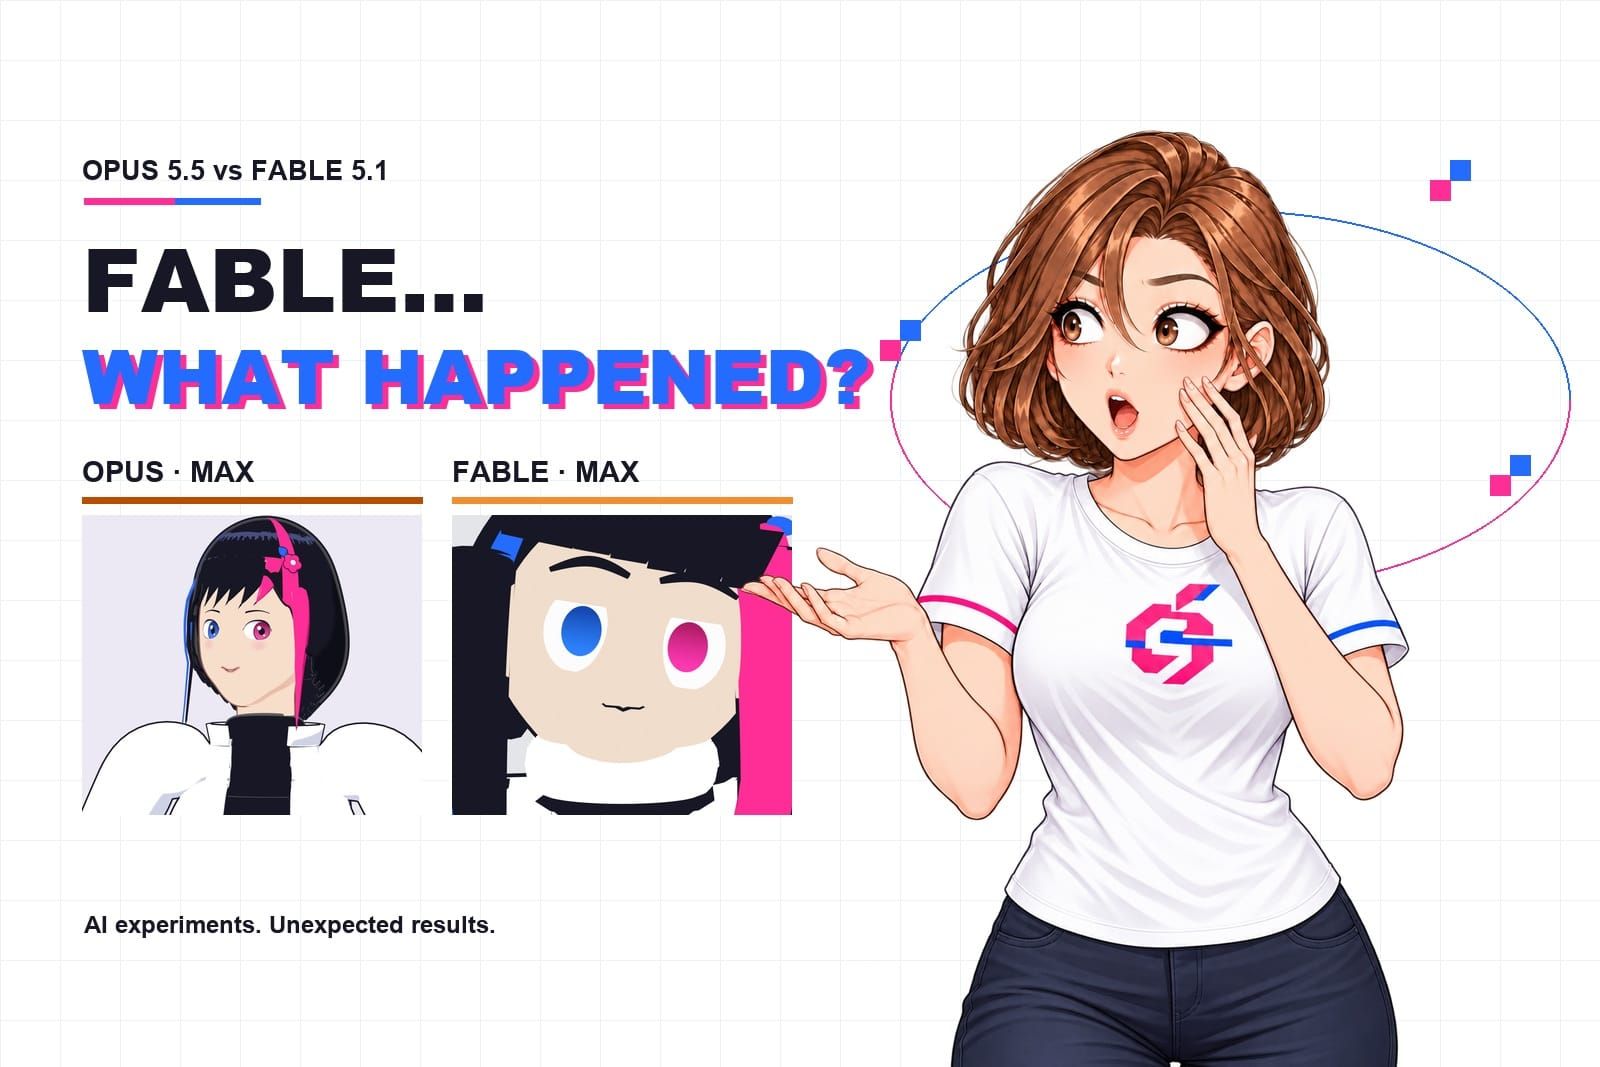
After reviewing the Fable outputs, I wanted the Opus results directly beside them. Fable felt much less consistent at 3D modeling, and the jump from Extra to Max sometimes made an image substantially worse.
This post compares the archived Opus 5.5 and Fable 5.1 results across thirteen Blender briefs. Every task has five setting pairs: Low, Medium/Mid, High, Extra and Max. Opus stays on the left and Fable on the right. Their exact recorded labels are shown on each card. On a phone, swipe inside a pair to see both larger images.
The Extra trees show that both can produce appealing work. The Max trees expose different problems: Opus overfills its canopy, while Fable builds a fan of thick tubular branches. The cloth, character and cabin comparisons also make the differences visible. Fable has stronger moments in mechanisms and at Max in the galaxy; the result is more specific than a single model ranking.
How to read this comparison
This is an AI-assisted visual comparison of existing experimental outputs, not a new run or a controlled model leaderboard. The single-model reviews have different functional-check coverage. No new shared numerical quality score, reliability statistic or cost-efficiency ranking is assigned.
The visual review includes the delivered stills and one video sample per second across each full clip, including v2. Commercial stills were opened individually; other images were checked in labelled overviews. This does not certify every frame or contact.
The labels are archived settings, not independently verified backend requests or equal computational budgets. Medium for Opus and Mid for Fable are aligned for navigation only. Different sessions, accumulated context, iterations and CPU/GPU conditions prevent attributing every difference to the model or setting.
The stills retain the original compositions. All animations are original-speed, full-duration looping GIFs. The two families’ galaxy clips run forward, rather than comparing Fable’s twelve-second animation against the older twenty-four-second Opus forward-and-reverse loop. GIFs restart independently; the page does not claim frame-synchronized playback.
Original briefs are available under each task. A rendered result, a responding control and a portable editable delivery are separate acceptance questions.
Revisions and data still missing
Opus has ten later v2 deliveries across the commercial and cabin. Fable now has ten available v2 deliveries, including the completed Extra commercial and cabin. Each v2 sits below its matching v1. Measured task token totals are missing for Opus Low, Medium and High. Accepted archived counters exist for ten Extra tasks and six Max tasks. Fable has no accepted measured per-task token totals across its five settings. Its corrected Max report gives approximately 1.52 million context-counter tokens across sessions, explicitly not billing telemetry. Missing usage is not zero, and these records do not establish a cheapest model.
Scene design and reconstruction
Task 1 — Tree and swing: recreating a supplied image
The reference fixes the broad oak silhouette, thick trunk, exposed roots, swing placement and irregular meadow base. The opposite camera tests whether the recreation has real depth. Adding leaves is only useful if the composition still matches.
Original brief — Task 1
TREE AND SWING — REFERENCE RECREATION
Use the attached tree-swing-reference.png as the visual source of truth. Recreate it as an editable three-dimensional Blender scene.

Match the full oak-tree silhouette, spreading canopy, thick branching trunk, exposed roots and the wooden swing suspended to the right by two ropes. Reproduce the irregular raised meadow base, curving stepping-stone path, weathered fence, flowerpot, mossy rocks, grass and small white/yellow flowers. Keep swing attachment points plausible and the seat clear of the trunk and ground.

Match the warm afternoon lighting, beige studio background, elevated three-quarter camera, framing and balance of the reference. Include the entire canopy and terrain with a clear margin. Preserve believable bark, rope, leaf, wood, stone and earth materials. Aim for the reference's detailed, crafted 3D appearance. Match broad foliage clusters and flower distribution rather than every individual leaf. Procedural scattering and instancing are encouraged.

Build real depth and geometry; do not project the reference onto objects or use it as a background. Infer unseen sides conservatively. Animation is not required.

DELIVERABLES
- tree-swing.blend
- A 1600 x 1600 PNG render matching the reference camera.
- A second PNG from the opposite three-quarter angle to demonstrate full 3D construction.
- README as described below.

GENERAL REQUIREMENTS
Work in Blender and deliver an actual editable 3D scene, not just instructions or concept art. You may use Python to build the scene. Use your own geometry and procedural materials; do not download finished models or use generated images as substitutes for geometry. Keep objects, materials, collections and controls meaningfully named. Pack any required resources and include any simulation caches beside the file using relative paths. State the Blender version used.
Inspect rendered output and fix obvious problems before delivering. Include a short README with how to open/play/use the result, the main controls and any incomplete requirements. Report limitations honestly. Prioritize a coherent finished result over excessive hidden detail.

Low


Medium / Mid


High


Extra


Max


Follow the space around the swing. Opus Extra leaves its main branches readable; Opus Max hangs more foliage in front of them. Fable’s Max problem is deeper in the construction: its bare trunk divides into several similarly thick tubes at almost the same height.


Both Extra trees can make appealing scenes. The Max pair loses different things: Opus hides a structure that was clearer before, while Fable needs a more believable branching pattern. More leaves cannot solve either problem by themselves.
Task 8 — Sakura temple: composing an environment
This brief gives creative freedom over layout and light while requiring a Buddhist temple hall, an architectural entrance gate, a walkable path and a coherent courtyard. Main, entrance and overhead views are separate deliverables, so the scene has to work beyond a single camera.
Original brief — Task 8
SAKURA TEMPLE — ENVIRONMENT DESIGN WITH CREATIVE FREEDOM

Create an original stylized Japanese Buddhist temple courtyard in Blender. This test evaluates your environment design, composition, materials and lighting. You have creative freedom over layout, architectural details, season-related storytelling, camera placement and time of day, within the constraints below.

SCOPE
Build a compact environment approximately 20 x 20 m, with a temple hall around 7 x 6 m as the main architectural feature. Include a roofed wooden entrance gate, a coherent walkable stone path leading toward the hall, two to four flowering sakura trees, at least two stone lanterns and a small planted or mossy garden area. Give the temple a raised wooden platform, visible steps, timber structural elements and a layered tiled roof with curved eaves. The entrance gate should be an architectural temple gate rather than a freestanding Shinto torii. This is an original fictional place, not a reconstruction of a real temple.

ART DIRECTION
Use a handcrafted stylized 3D animated-film appearance: appealing simplified forms, enough modeled detail to reward closer viewing, subtle surface variation and a harmonious palette. Sakura blossoms should provide soft pink accents against wood, stone and greenery. Choose a lighting setup that supports a clear mood and makes the main architecture readable. Avoid flat unlit colors, excessive bloom and excessive depth of field.

CREATIVE FREEDOM
Decide the courtyard layout, whether it is level or terraced, the precise architectural silhouette, arrangement of trees, weather and time of day. You may add a few purposeful supporting elements, such as a stone basin, wooden bench, fallen petals or a small stream, but do not turn the scene into a crowded prop collection. Give the viewer a clear visual route from entrance toward the temple and a distinct focal point. No characters, signage or text are required. Do not copy an existing film scene.

TECHNICAL REQUIREMENTS
Build actual three-dimensional architecture and vegetation. Repeated tiles, blossoms and foliage may use procedural instancing. Use coherent scale, plausible load-bearing connections, continuous stairs and paths, and convincing contact with the ground. Avoid floating lanterns, trees clipping through roofs and roofs with open accidental gaps. Simplify distant context so most effort goes into the courtyard. Organize terrain, architecture, foliage, props, lights and cameras in separate collections.

PRESENTATION
Create one carefully composed main camera view showing the courtyard's visual story, a second view from near the entrance, and an elevated overview that exposes the layout. All three should be intentional rendered views of the same scene. Animation is not required. Additional animation must not replace the still-image deliverables or distract from environment quality.

DELIVERABLES
- sakura-temple.blend.
- Three 1920 x 1080 PNGs: main composition, entrance view and elevated overview.
- README.txt explaining your chosen mood, layout and main design decisions in a short paragraph, plus technical notes and limitations.

GENERAL REQUIREMENTS
Create the actual editable Blender project, not only a plan or code listing. Python automation is allowed. Build your own geometry and procedural materials; do not download finished models or substitute generated images for 3D geometry. Use meaningful names and organized collections. Pack required resources, and provide any baked caches using relative paths. State the Blender version and any required add-ons in README.txt. Do not assume paid or separately installed tools are available.

Inspect the rendered result and the saved project. Fix obvious defects before delivery. Include a short README.txt describing how to open and use the file, controls, implementation choices, checks performed and honest limitations. Do not claim that an export or simulation was validated unless it was actually checked. Prioritize a complete coherent result over unnecessary detail.
Low


Medium / Mid


High


Extra


Max


Opus and Fable both build substantially richer courtyards at their higher settings, but composition and atmosphere do not progress in a straight line. Fable Extra has warmer, more cohesive staging than its more even Max view.
The Opus Extra temple needed repeated reframing to keep the roof in view. Its final camera stays level and uses lens shift.
Fable: Low's pink blobs and toy-like base miss the setting. High hides the temple behind foliage and piles pink forms on the steps. Extra has warmer, more coherent staging, but a foreground lantern blocks part of the building. Max crops the architecture and flattens the light. Extra wins this comparison without becoming faultless.
Opus's temples still have cotton-ball blossoms, repeated foliage and conspicuously regular textures. Low crops the roof; Max also cuts into the roof and entrance. Extra gives the architecture more room to read. The stronger courtyard composition doesn't turn those blossom clusters into convincing trees.
Task 11 — Attic: improving someone else’s scene
The task starts with an unfinished astronomer’s workspace. The model must inspect the file, diagnose problems and improve the actual scene. Main_Camera must keep its position, rotation and focal length, making before/after comparisons meaningful.
Original brief — Task 11
ATTIC ASTRONOMER WORKSPACE - IMPROVEMENT BRIEF

You receive two files:
- flawed-attic-starter.blend: an editable Blender scene (created in Blender 5.2, Cycles, metric units)
- flawed-attic-before.png: a 1600 x 1000 render from the file's saved camera "Main_Camera"

The scene is an unfinished draft. Your job is to inspect it and turn it into a convincing, polished result.

INTENDED RESULT
A cozy small attic workspace belonging to a hobby astronomer, at blue hour. The room is about 4 x 3 m with a ceiling sloping from 2.8 m to 1.6 m and a circular window. Beneath the window stands a wooden desk with a chair, a small brass telescope on a tabletop tripod, an articulated desk lamp, books and a ceramic mug. A bookshelf, a potted plant and a rug complete the room. Through the window a simple twilight sky with distant hill silhouettes is visible.

The intended atmosphere is warm lamplight against cool evening light, with readable materials, believable construction and an inviting composition. The scene should hold up both in the final render and when someone opens the file and works with it.

WHAT TO DO
1. Inspect the provided .blend file itself, not only the before-render.
2. Decide what keeps the draft from the intended result and improve it directly in the file. Prioritise and choose methods on your own judgement.
3. Keep the file practical: separate, editable objects with meaningful names; self-contained procedural materials (no downloaded assets, external images or add-on dependencies); sensible collections; reasonable render time.
4. Keep the existing object "Main_Camera" at its current position, rotation and lens so the before/after comparison stays valid. If you think a different framing works better, add it as a second camera instead of changing Main_Camera.

DELIVERABLES
- flawed-attic-improved.blend - the improved, editable scene
- flawed-attic-after.png - 1600 x 1000 render from the original Main_Camera, for direct comparison with flawed-attic-before.png
- optional: flawed-attic-after-alt-camera.png - 1600 x 1000 render from your additional camera, if you created one
- a short change log: what you found, what you changed, what you deliberately left as is, and anything you could not verify

Render the after-image from the saved .blend you deliver, so the image and the file match.

Low


Medium / Mid


High


Extra


Max


Because both models began from the same room and had to preserve its main camera, these images expose lighting and arrangement choices particularly well. Opus Max produces a strong warm/cool contrast and a more visibly rearranged workspace. Fable Max has a readable desk/window balance, while its Extra view is markedly darker and cooler. The Fable camera-preservation checks passed at every setting.
Opus Medium’s attic took another try after the first lighting adjustment left a white highlight on the telescope. The final script hides the window lights from reflections and the camera, reducing the unwanted highlight.
Low and Mid put the chair in front of the desk and make the floor strongly striped. High leaves a harsh hot spot, while Extra stays dark and cool. Max balances desk and window better. The room itself was supplied, so that improvement belongs to arrangement and lighting rather than newly built assets.
Opus: Medium keeps the window area dark, High changes the supplied scene more modestly, and Extra is cool. Max's warm and cool contrast is stronger, but the hard hot spot remains. The furniture came with the starting file; this task tests the models’ changes to the room.
Reusable procedural assets
Task 2 — Roof generator: reusable geometry
One Geometry Nodes asset must create all roof examples through exposed parameters. The brief asks for actual overlapping tiles, partial boundary tiles, ridge caps and sensible chimney clearances. Reusability requires a live response to controls, not separately rebuilt display models.
Original brief — Task 2
REUSABLE PROCEDURAL ROOFTOP — GEOMETRY NODES
Build an editable reusable Geometry Nodes asset in Blender that generates a pitched gable roof suitable for a stylized countryside cottage. The same node group must generate every example by changing exposed parameters; do not manually rebuild example roofs.

GEOMETRY
Include two roof slopes, overlapping rows of terracotta tiles, ridge caps, roof-edge trim, configurable eaves and optional chimneys. Tiles must be actual geometry or geometry instances rather than only a texture. Correctly orient tiles on each slope, support partial tiles at boundaries and cover the ridge without obvious holes. Some deliberate tile overlap is expected. Fit each chimney to the roof surface and omit or trim tiles where its shaft passes through. Add a small flashing collar around each chimney base.

EXPOSE THESE LABELED CONTROLS
- Building Width: 3–12 m, perpendicular to ridge.
- Building Length: 3–16 m, parallel to ridge.
- Roof Pitch: 20–55 degrees.
- Eave Overhang: 0.15–0.60 m.
- Tile Width: 0.18–0.40 m.
- Tile Length: 0.28–0.55 m.
- Weathering: 0–1, affecting restrained tile color variation and small surface irregularity without breaking roof coverage.
- Chimney Count: integer 0–3.
- Random Seed: integer, reproducibly controlling variation and valid chimney placement.
- Tile Material and Trim Material inputs.
Document units and any necessary input clamping. Use safe internal tile overlap. Prevent chimney overlap by distributing them along valid roof locations, and clamp their size if necessary on small roofs.

REUSABILITY
Changing width, length or tile size must recalculate row and column counts and edge treatment. Preserve believable tile dimensions instead of stretching a fixed roof mesh. Changing pitch must correctly update tile orientation, ridge and chimney intersections. The seed must reproduce the same result for identical settings. Use instancing where suitable for performance. Keep the node group organized into labeled frames and mark the reusable object as an asset.

DEMONSTRATE THREE PRESETS
1. Small cottage: width 4 m, length 5 m, pitch 45 degrees, overhang 0.30 m, tile width 0.24 m, tile length 0.36 m, weathering 0.25, 1 chimney, seed 11.
2. Long farmhouse: width 7 m, length 12 m, pitch 30 degrees, overhang 0.45 m, tile width 0.30 m, tile length 0.45 m, weathering 0.65, 3 chimneys, seed 22.
3. Broad clean roof: width 10 m, length 8 m, pitch 25 degrees, overhang 0.25 m, tile width 0.36 m, tile length 0.50 m, weathering 0.05, 0 chimneys, seed 33.
Mount examples on simple neutral building volumes for presentation. Arrange them so all three roofs can be inspected in one studio render, with consistent scale and lighting.

VALIDATION
Check all three presets and a small/steep and large/shallow combination within the specified ranges. Verify roof coverage, ridge alignment, stable chimney placement and deterministic seeds. State any parameter combinations that do not work instead of hiding them.

DELIVERABLES
- rooftop-generator.blend containing the reusable asset and three live procedural example objects sharing the same node group.
- A 1920 x 1080 overview PNG and one roof-detail PNG.
- README explaining controls, how to reuse the asset and any limitations.

GENERAL REQUIREMENTS
Work in Blender and deliver an actual editable 3D scene, not just instructions or concept art. You may use Python to build the scene. Use your own geometry and procedural materials; do not download finished models or use generated images as substitutes for geometry. Keep objects, materials, collections and controls meaningfully named. Pack any required resources and include any simulation caches beside the file using relative paths. State the Blender version used.
Inspect rendered output and fix obvious problems before delivering. Include a short README with how to open/play/use the result, the main controls and any incomplete requirements. Report limitations honestly. Prioritize a coherent finished result over excessive hidden detail.
Low


Medium / Mid


High


Extra


Max


Look underneath Opus Low’s chimney cap, then between Fable High’s tile rows. The first has a visible gap between cap and shaft. The second has raised tile lips with repeated deep slots. Both are easier to miss in the roof overview than in the delivered detail camera.


The higher settings improve the tiling and ridge treatment. Around the chimneys, broad flashing plates still look laid over the curved tiles rather than fitted to them. The responding procedural controls and the visible construction quality need separate judgments.
Task 9 — Galaxy: procedural structure and visual coherence
The galaxy needs a readable core, spiral arms, dust lanes, reproducible controls and a camera arc revealing disc thickness. The brief explicitly calls it an artistic visualization rather than a scientific gravitational simulation.
Original brief — Task 9
PROCEDURAL SPIRAL GALAXY — ANIMATED 3D VISUALIZATION

Create an impressive editable spiral-galaxy visualization in Blender, with a 12-second animation at 24 fps (frames 1–288). This is a procedural visual simulation with artistically compressed time and scale, NOT a scientific gravitational N-body benchmark. Clearly state this distinction in the README.

VISUAL TARGET
Build a luminous central bulge, four sweeping spiral arms, a thin stellar disk with finite thickness, darker dusty lanes and a restrained halo of scattered stars. Use warm ivory/gold near the core, cooler white/blue concentrations in the arms and subtle pink nebula accents. Keep individual stars subordinate to the galactic structure. The center should be bright without clipping into a featureless white blob. The scene is set against dark space with sparse distant background stars.

PROCEDURAL STRUCTURE
Use Geometry Nodes, a scripted generator, or a combination. Generate at least 20,000 efficiently represented stellar points/instances rather than thousands of separately managed mesh objects. Provide density falloff with radius, finite disk thickness, random scatter around the spiral arms and a reproducible random seed. Include dust that actually affects the rendered appearance using suitable geometry/materials or a manageable volume. A flat galaxy texture, image plane, background painting or pre-rendered movie is not acceptable.

EXPOSE CLEARLY LABELED CONTROLS
- Random Seed.
- Star Count (usable range at least 20,000–100,000).
- Galaxy Radius in artistic scene units.
- Arm Count (2–6).
- Arm Winding/Tightness.
- Disk Thickness.
- Core Size and Core Brightness.
- Dust Amount.
- Rotation Speed.
Describe units, intended ranges and how to regenerate if the setup uses a script. At minimum, a user must be able to change seed, arm count and radius without editing source code. Other controls may live in one clearly identified settings panel or node group.

ANIMATION
Create subtle differential rotation: inner and outer stellar populations should not all rotate as one rigid object. Use a radius-dependent angular speed with a smooth bounded value near the core. Keep the total motion restrained enough that recognizable spiral structure survives the short demonstration; explain that this is an artistic approximation. Avoid discontinuities, frame-to-frame random reseeding and flickering point distribution.

The camera begins at an elevated oblique angle with the whole galaxy visible, then makes a smooth modest arc and lowers toward a shallower angle so the disk thickness becomes evident. Finish on a strong wide composition. Keep the galaxy within the frame, with no cuts or sudden jumps. Retain enough depth to reveal that this is genuinely a 3D scene.

TECHNICAL AND QUALITY CHECKS
Use efficient instancing/point rendering and controlled emission. Inspect several rendered frames for noise, flicker, blown highlights and disappearing stars. Verify that identical seeds produce identical geometry. Demonstrate a second seed and a two-arm configuration in additional still renders, then restore the main four-arm setup in the delivered scene. Save any required animation caches. Do not describe aesthetic orbit motion as physically validated astrophysics.

DELIVERABLES
- procedural-galaxy.blend with editable generator, controls, animation and camera.
- A 1920 x 1080 main hero PNG.
- Two additional PNGs demonstrating a second seed and a two-arm configuration.
- A complete 12-second animation preview at minimum 1280 x 720, MP4 or numbered PNG sequence.
- README.txt explaining controls, generation method, artistic motion model, performance choices and limitations.

GENERAL REQUIREMENTS
Create the actual editable Blender project, not only a plan or code listing. Python automation is allowed. Build your own geometry and procedural materials; do not download finished models or substitute generated images for 3D geometry. Use meaningful names and organized collections. Pack required resources, and provide any baked caches using relative paths. State the Blender version and any required add-ons in README.txt. Do not assume paid or separately installed tools are available.

Inspect the rendered result and the saved project. Fix obvious defects before delivery. Include a short README.txt describing how to open and use the file, controls, implementation choices, checks performed and honest limitations. Do not claim that an export or simulation was validated unless it was actually checked. Prioritize a complete coherent result over unnecessary detail.
Low


Medium / Mid


High


Extra


Max


Opus High keeps a readable stellar structure; Fable High covers much of it with large opaque grey and pink discs. Fable recovers at Max, with a coherent warm core, cooler arms and finite disc. Opus Max also gives a clear luminous spiral. Both are artistic visualizations, not scientific gravity simulations. These GIFs run forward at the original speed; the older Opus forward-and-reverse loop is not used for this comparison.
Fable: High's opaque gray discs stay in view as the galaxy rotates. Mid is flat and Extra reads more like a white spiral graphic. Max restores a readable core, arms and disc. Max is a clear improvement over High.
Opus: Medium and High carry conspicuous pink polygon dots through their rotating arms. Extra blurs the structure into clumps, while Max keeps readable but soft, smeared bands. Low's simple spiral remains surprisingly easy to read. Rotation works in the sampled states; realistic star density is another question.
Mechanical products
Task 3 — Pocket planetarium: a staged mechanical reveal
The pocket device must open, deploy its mechanism and present an illuminated planetary display in a twelve-second sequence. The reveal, optics, control behavior and camera framing all contribute to the result.
Original brief — Task 3
POCKET PLANETARIUM — PRODUCT ANIMATION
Create an original miniature folding planetarium in Blender and present it in a polished 12-second product animation at 24 fps (frames 1–288).

DESIGN
The closed device is approximately 12 cm across: a rounded hexagonal midnight-blue metal housing with restrained brushed-brass trim, a visible lid seam and one small power button. It rests on a dark matte tabletop. Make the mechanism understandable: a hinged lid opens backward, three short support feet unfold from separate lower recesses, and a compact projector lens rises vertically from the center. All moving parts remain mechanically attached with visible hinges or guides. Leave clearance for the complete movement; the lid must not obstruct the lens or the display.

Above the lens, create a fictional luminous miniature solar-system display about 30 cm wide: one warm glowing central star, four distinct planets and thin orbital paths. Give one outer planet rings. This floating display is an intentional science-fiction visual effect, not a claim of a physically possible projector or an accurate astronomical simulation. Keep the device itself mechanically coherent. Orbital periods and planet sizes can be artistically compressed; avoid collisions. Planets must be 3D objects visible from changing camera angles.

ANIMATION
Frames 1–48: establish the closed device, then open the lid and unfold its support feet with controlled ease-in/ease-out motion.
Frames 49–96: raise the lens, illuminate the button and bring the star and orbital display into view gradually.
Frames 97–240: planets orbit at distinct speeds while the camera makes a restrained 35-degree arc around the product. Include gentle axial rotation and subtle emissive detail without overwhelming glare.
Frames 241–288: settle on a clean hero composition with the entire device and solar system visible; orbital motion continues.

LOOK
Premium imaginative industrial design, navy enamel, brushed brass, dark glass and restrained cyan/amber light. Use a warm key light, cool edge light and a dark blue studio background. Reflections should describe the surfaces clearly. No branding or text overlays. Avoid gratuitous gears, pipes or floating mechanical parts.

TECHNICAL REQUIREMENTS
Use a clear parent/constraint hierarchy and editable animation. Keep hinges at actual pivot points. Expose a master display-intensity control and a master orbit-speed control. Model and animate real geometry; do not use a flat video or image for the solar system.

DELIVERABLES
- pocket-planetarium.blend with animation, camera, lights and materials.
- A 1920 x 1080 hero PNG.
- The complete 12-second preview at a minimum of 1280 x 720, as MP4 or a numbered PNG sequence.
- README as described below.

GENERAL REQUIREMENTS
Work in Blender and deliver an actual editable 3D scene, not just instructions or concept art. You may use Python to build the scene. Use your own geometry and procedural materials; do not download finished models or use generated images as substitutes for geometry. Keep objects, materials, collections and controls meaningfully named. Pack any required resources and include any simulation caches beside the file using relative paths. State the Blender version used.
Inspect rendered output and fix obvious problems before delivering. Include a short README with how to open/play/use the result, the main controls and any incomplete requirements. Report limitations honestly. Prioritize a coherent finished result over excessive hidden detail.
Low


Medium / Mid


High


Extra


Max


Start with Fable Mid’s case. At roughly 1–1.5 seconds, its lid drops through the base while opening. Opus Low has a different failure: its rising lid leaves the frame. One breaks the visible fit of the moving parts; the other stops showing the movement clearly.


Fable High keeps its lid and base more clearly separated during this opening phase. Opus High contains more of its reveal but draws a hard triangular beam. A successful planetarium needs a readable sequence as well as a pleasing final display; the open-case still is only the ending of that test.
Task 5 — Blossom lamp: opening geometry and material finish
The lamp combines moving petals, mechanical linkage, a usable opening control and a convincing light source. The open and closed states must both form a deliberate product design.
Original brief — Task 5
MECHANICAL BLOSSOM LAMP — PRODUCT ANIMATION
Create an original functional-looking tabletop blossom lamp in Blender and a polished 12-second product animation at 24 fps (frames 1–288).

DESIGN
The lamp is approximately 35 cm tall with a stable circular weighted base, a short curved stem and a flower-shaped head. Use six broad rounded metal petals around a fixed frosted-glass central light. Petal exteriors are deep muted green enamel; interiors are warm brushed brass. Base and stem are dark satin metal. Include a discreet power cord exiting the rear of the base and a small physical switch on top of the base.

Each petal is attached at its lower end to a visible hinge around the central hub. All six petals open outward through approximately 55 degrees from their closed position, revealing the luminous glass center. Give each petal a short visible linkage connecting it to a shared actuator collar sliding along the stem axis near the head. Coordinate collar, linkage and hinge motion so rods remain attached throughout. Design spacing so petals never intersect one another, the bulb or the stem. Closed petals form a loose protective bud around the glass with small intentional gaps; do not force impossible interlocking geometry.

ANIMATION
Frames 1–48: show the closed unlit lamp, with a gentle camera approach.
Frames 49–72: the switch moves and the central light begins to warm up.
Frames 73–168: the actuator collar moves and the six petals open smoothly together; the central light increases gradually.
Frames 169–240: hold the open blossom while the camera arcs about 30 degrees to reveal the mechanism and interior surfaces.
Frames 241–288: finish on a steady hero composition, fully open and warmly illuminated.

LOOK
Elegant botanical product design with believable manufacture, subtle bevels and restrained surface variation. Warm ivory studio surroundings, soft shadows and readable metal reflections. Let the lamp cast actual light onto nearby surfaces. No overexposure, text overlays or decorative mechanisms without a function.

TECHNICAL REQUIREMENTS
Use editable geometry and an organized rig. Expose one clearly named Bloom control that drives petal opening and the actuator linkage, plus a separate Light Intensity control. Place all hinge pivots correctly. Keyframed mechanical motion is appropriate; a physics simulation is not required.

DELIVERABLES
- blossom-lamp.blend with complete animation.
- Two 1920 x 1080 PNGs showing the closed and fully open lamp.
- The complete 12-second preview at a minimum of 1280 x 720, as MP4 or numbered PNG sequence.
- README as described below.

GENERAL REQUIREMENTS
Work in Blender and deliver an actual editable 3D scene, not just instructions or concept art. You may use Python to build the scene. Use your own geometry and procedural materials; do not download finished models or use generated images as substitutes for geometry. Keep objects, materials, collections and controls meaningfully named. Pack any required resources and include any simulation caches beside the file using relative paths. State the Blender version used.
Inspect rendered output and fix obvious problems before delivering. Include a short README with how to open/play/use the result, the main controls and any incomplete requirements. Report limitations honestly. Prioritize a coherent finished result over excessive hidden detail.
Low


Medium / Mid


High


Extra


Max


The Opus lamps retain a recognizable design across settings, with changes mainly in finish and presentation. Fable varies more: Low’s thick green petals give way to slimmer, more mechanical forms. Extra and Max are useful examples of Fable producing coherent product work. The independent opening-control checks confirm geometric response across its five settings. They do not measure light output or establish collision-free linkage throughout the motion.
Fable: Low's petals look swollen, and its base leaves the frame late in the animation. High cuts off the closed head and much of the stem during opening. Extra and Max make the movement easier to follow. That's a useful improvement, without proving the linkage could be built.
Opus: The sampled openings are coherent, and the lamp stays in frame. The closed High lamp still has large bright gaps, Extra hides its linkage in shadow, and Max turns the bulb into a featureless white shape.
Task 10 — VR headset: separation and reassembly
The headset brief requires distinct internally coherent components, readable separation and a return to the same assembled design. Parts need plausible places in the enclosure. It is a fictional concept, without a claim of validated optics or electronics.
Original brief — Task 10
VR HEADSET — EXPLODED VIEW AND REASSEMBLY

Create an original fictional standalone VR headset in Blender and present it in a polished 15-second exploded-view product animation at 24 fps, frames 1–360. Build the actual editable 3D scene and animation, not just a concept image or instructions.

DESIGN
Design a premium compact headset approximately 20 cm wide, 11 cm tall and 12 cm deep, excluding its straps. Use a warm-white matte polymer outer shell, charcoal fabric facial cushion and head straps, dark optical glass and restrained electric-blue accents. Include two front tracking-camera windows, a small side power button, a charging port and a top ventilation grille. No logos or text are required.

This is an original concept with a simplified, internally coherent architecture. Do not claim it reproduces a real commercial headset or has a validated optical/electronic design. Avoid gratuitous decorative components: every visible part must have an understandable place in the assembly.

ASSEMBLY — MODEL THESE AS DISTINCT COMPONENTS
From the user's face toward the outer front of the headset:
1. A removable fabric-covered facial cushion with a nose cutout and its supporting gasket frame.
2. A rear eyepiece housing with two eye openings and a matching nose clearance.
3. Two separate convex optical lenses held in opaque lens barrels, one per eye.
4. Two separate display modules, each aligned behind its corresponding lens along the viewing axis.
5. A rigid inner chassis with fitted seats supporting the lens and display modules.
6. A main circuit board with simplified but modeled chips, connectors and mounting holes, positioned above the optical channels so it does not block either display.
7. A compact heat spreader and vented cooling module above the circuit board.
8. A small battery module in a defined lower compartment, clear of the optical paths.
9. Two small camera modules aligned with the front tracking windows.
10. A removable front cover with the matching camera windows and ventilation features.
11. Left and right strap brackets, a rear fabric strap and a top strap, with clear physical attachment points.
12. At least four visible mounting screws with matching holes or bosses.

Model shell thickness, seams, mounting features and enough internal detail to make the exploded view informative. All components must fit inside the assembled enclosure. Avoid boards passing through optics, batteries occupying the same space as displays, or screws with nowhere to fasten. Use rounded edges and plausible manufacture. Electronic traces can be procedural textures; major components must be geometry.

Coordinate convention: local X is left/right, local Y runs from the wearer's face toward the front cover, and local Z is up. Keep the lenses and displays paired correctly. Maintain the same parts, shapes and materials throughout the animation.

EXPLOSION DESIGN
Use a main separation axis along local Y to reveal the front-to-back stack. Move the upper electronics and cooling assembly upward, the battery downward, and the strap assembly slightly backward and outward to prevent visual overlap. Withdraw mounting screws along their fastening axes before separating the shells. Use deliberate spacing and a modest stagger so viewers can follow the construction.

The exploded state must remain understandable: preserve lens/display alignment, avoid arbitrary rotations, and keep each component near its assembly axis. Rigid parts must not stretch, shrink, disappear or pass through one another. For straps, preserve believable shape using separate attachment groups or a controlled deformation; do not pull a rigid strap mesh through the shell.

Do not show cables tethering widely separated parts implausibly. You may omit internal wiring entirely as an explicit conceptual simplification. If you include wiring, show believable disconnection and avoid stretched connections. Document the choice.

ANIMATION — 15 SECONDS, 24 FPS
Frames 1–48: assembled hero shot, with a restrained camera arc showing the shell, cushion and straps.
Frames 49–168: withdraw screws, release the cover and cushion, then separate the internal subassemblies in an intelligible sequence. All parts remain visible.
Frames 169–240: hold the fully exploded state while the camera arcs about 25 degrees, revealing the optical stack and upper/lower electronics. Leave enough space between components to see their shapes.
Frames 241–336: reverse the process in a physically sensible order, seating internal parts before covers and screws. Return every part precisely to its assembled position.
Frames 337–360: settle on a clean assembled hero composition.

No camera cuts that hide transitions. Use controlled ease-in/ease-out motion. End in the same assembly configuration as the start. This is a mechanical presentation animation; rigid-body simulation is not required.

RIG AND EDITABILITY
- Organize the scene into clearly named component/subassembly collections.
- Preserve local component transforms using parent empties or an equivalent organized hierarchy.
- Provide one clearly named Explosion control from 0 (assembled) to 1 (fully exploded), driving the component offsets and their staggered timing. Keyframe this control for opening and reassembly. Keep camera motion separate.
- The Explosion control must work at intermediate values and in reverse without requiring a simulation cache or manual repositioning.
- Provide an assembled camera and an exploded inspection camera in addition to the animated camera if useful.

LOOK AND LIGHTING
Use a dark blue-gray studio background, soft broad key light and subtle edge lighting. Maintain readable contrast between white shells, black fabric, glass lenses and internal electronics. Make transparent optics visible through controlled reflections without turning them into opaque chrome. Use restrained bloom and keep the entire assembly in focus. Avoid labels, arrows and text overlays; component identity should come from geometry and placement.

VALIDATION
Inspect Explosion at 0, 0.25, 0.5, 0.75 and 1. Check fit in the assembled state, intersecting parts during separation, optical alignment and composition in the exploded state. Confirm that all moving components return to their original transforms at the end. Inspect rendered frames from assembled, transitional and exploded states. Fix obvious clipping and accidental floating parts before delivery.

DELIVERABLES
- vr-headset-exploded-view.blend with complete geometry, materials, controls, animation, lights and cameras.
- Two 1920 x 1080 PNG renders: assembled hero and fully exploded view.
- The full 15-second animation preview at minimum 1280 x 720, as MP4 or a numbered PNG sequence.
- README.txt with the Blender version, instructions for the Explosion control, a component inventory, conceptual simplifications, checks performed and any known limitations.

GENERAL REQUIREMENTS
Python automation is allowed. Build your own geometry and procedural materials; do not download a finished headset or use a reference image as a flat substitute for the model. Keep assets self-contained and pack any required external resources. Do not require paid add-ons. Save an editable file that opens and renders. Report incomplete requirements honestly. Prioritize coherent assembly, clear motion and strong presentation over invisible microscopic detail.
Low


Medium / Mid


High


Extra


Max


The Opus exploded views separate internal layers clearly from early in the setting range. Fable Low is boxier, and Mid’s large front plate hides much of the separation in the animation. Fable High through Max improve the cushion, straps and overall product shape. This is an area where Fable Max is comparatively successful. A visually informative explosion still does not validate a real optical design or prove every internal component fits without collision.
Fable: Low and High let straps or small upper parts leave the frame during the explosion. Mid's front shield hides the internal layers that the view should reveal. Extra keeps conspicuous gaps when assembled, and Max's top strap has twisted, free-looking ends. The control responds, but each presentation still has something to fix.
Opus Medium crops its top strap at the start, and High does it both early and late in the clip. Extra and Max keep the exploded assembly more readable. Even there, a coherent animation isn't a physical validation of the headset's internals.
Physics and cloth
Task 4 — Clothesline: cloth motion and a portable cache
Three real cloth simulations must respond to one changing wind field over an eight-second presentation range. Readable pinning, different fabric weights, garments with openings and portable baked caches matter more than decorative scenery.
Original brief — Task 4
WINDY COTTAGE CLOTHESLINE — CLOTH SIMULATION
Use the attached clothesline-reference.png for the scene composition, materials, palette and atmosphere. Create an original warm countryside terrace scene in Blender and an 8-second cloth-simulation animation at 24 fps (192 delivered frames).

SCENE
Build the stone terrace, two wooden posts with visible supports, one continuous gently sagging clothesline, a low stone parapet, a partial rustic cottage at the left and a wicker laundry basket in the foreground. Add restrained potted plants and flowers. Simplified three-dimensional hills, trees and mountains can form the distant background. Match the airy warm daylight and pastoral animated-film atmosphere. Keep the camera almost still and all three hanging items clearly visible throughout.

CLOTH
Hang three separate items from left to right: an ivory rectangular bedsheet, a dusty-blue short-sleeved shirt and a terracotta long skirt. Use two clearly visible clothespins per item. Pin the sheet at its top corners, the shirt near its shoulders, and the skirt at two waistband locations. Model the shirt and skirt as garments with actual openings and joined fabric surfaces, not flat silhouette cutouts. Attachments must remain aligned with the clothesline.

Use Blender's actual cloth simulation on all three hanging items. The bedsheet should billow broadly, the lighter shirt should flutter in smaller folds, and the heavier skirt should have slower, weightier motion. Use appropriate mesh resolution and distinct physically motivated cloth settings. Provide enough clearance above the floor and between items. Enable suitable self-collision and collisions with nearby solid objects. No visible mesh explosions, persistent interpenetration or detached pin points.

WIND AND TIMING
Use a shared wind force field with mild turbulence so all items respond to the same environment without moving identically. Begin after a settling period. During delivered seconds 0–2 use a light breeze, seconds 2–5 a gradual stronger gust, and seconds 5–8 ease back to the original breeze. Bake the simulation including pre-roll; identify the exact 192-frame presentation range in the README. A perfect loop is not required. The rope may remain static with modeled sag; simulating it is optional. Do not replace cloth motion with shape keys or a looping displacement modifier.

VISUAL PRIORITY
Keep fabric folds, readable pinning, realistic interaction and stable motion as the priority. The reference is a composition target, not a requirement to reproduce the exact instantaneous folds. Use actual lighting and materials with subtle fabric translucency. Avoid heavy depth of field that conceals simulation quality.

DELIVERABLES
- clothesline.blend and all required baked cache files with portable relative paths.
- A 1920 x 1080 hero PNG from the simulation.
- The complete 8-second preview at a minimum of 1280 x 720, as MP4 or numbered PNG sequence.
- README documenting simulation settings, cache location, pre-roll and playback range.

GENERAL REQUIREMENTS
Work in Blender and deliver an actual editable 3D scene, not just instructions or concept art. You may use Python to build the scene. Use your own geometry and procedural materials; do not download finished models or use generated images as substitutes for geometry. Keep objects, materials, collections and controls meaningfully named. Pack any required resources and include any simulation caches beside the file using relative paths. State the Blender version used.
Inspect rendered output and fix obvious problems before delivering. Include a short README with how to open/play/use the result, the main controls and any incomplete requirements. Report limitations honestly. Prioritize a coherent finished result over excessive hidden detail.

Low


Medium / Mid


High


Extra


Max


Compare the large sheets rather than the paving. Opus Max develops a broad billow. Fable Extra’s sheet remains much flatter while its smaller garments move. The full clips make that difference easier to follow than a row of fabric stills.


Opus’s stronger setting still has artificial landscape shapes, and its Extra cloud is an enormous stack of polygons. Fable adds wall and paving detail without giving every garment a convincing response. These are separate weaknesses in the environment and the cloth itself.
Task 6 — Robot: a handoff from animation to physics
The arm must pick up a cube, carry it to a ramp and release it into actual rigid-body physics before the final resting state. The important transition is the handoff: the cube must not teleport or simply follow a keyed path into the tray.
Original brief — Task 6
ROBOT PICK-AND-PLACE — MECHANICAL ANIMATION AND PHYSICS

Create a polished tabletop robotics demonstration in Blender: an articulated robot picks up a cube, carries it to a ramp, releases it, and the cube slides down the ramp into a catch tray. Deliver a 12-second animation at 24 fps, frames 1–288.

DESIGN AND SCALE
Use metric units. The workbench is approximately 1.8 x 1.0 m. The robot has a fixed base, rotating shoulder assembly, upper arm, forearm, wrist and a parallel two-finger gripper. Use visible pivot housings and believable joint connections. Design the arm's reach and joint limits to suit the task. The cube is 0.10 m per side with slightly beveled edges. The ramp is approximately 0.55 m long and slopes downward by about 25 degrees, with low side rails. A shallow catch tray with a padded-looking interior sits at its lower end.

Place the initial cube on a raised pickup block, the ramp start within robot reach, and the tray clearly visible. Give the scene an original compact industrial-lab look: light warm-gray robot shells, dark joints, restrained blue details, and an orange cube. Use studio lighting, readable shadows and a three-quarter camera that shows the entire interaction. No logos or explanatory overlays are required.

ANIMATION
Frames 1–36: establish the setup; robot approaches the cube with its gripper open.
Frames 37–72: align the fingers on opposite sides and close them around the cube without visibly crushing or penetrating it.
Frames 73–144: lift and carry the cube in an arc to the upper end of the ramp, avoiding all obstacles.
Frames 145–168: lower it just above the ramp, open the gripper, and release it with a clean handoff to physics no later than frame 168.
Frames 169–240: the cube moves under gravity, slides/tumbles down the ramp, collides with the tray and settles. The arm withdraws clear of the motion.
Frames 241–288: hold the completed state with the cube resting in the tray.

TECHNICAL REQUIREMENTS
- Build an editable armature or articulated hierarchy with proper joint pivots. Include a usable wrist target and gripper-open control; use IK where appropriate.
- Robot motion may be keyframed. For reliable pickup, constraining or animating the cube while held is allowed and must be documented. Do not claim that this is simulated frictional gripping.
- After release, the cube must be an active rigid body driven by actual Blender rigid-body physics. Ramp, rails, table and catch tray need appropriate passive collision geometry. Do not keyframe the cube's post-release journey.
- Set the release transform consistently so it does not jump, teleport or acquire an arbitrary velocity at handoff.
- Use suitable collision shapes, margins, solver quality, friction and restitution at the chosen real-world scale. Bake/cache the physics.
- Keep the arm, fingers and cube free of obvious intersections. Hide no failures with camera cuts or off-screen transitions.

VALIDATION
Play the whole sequence from its start and inspect approach, grip, release, ramp contact and final resting state. Verify that the saved file plus included cache reproduces the motion. Explain the exact release frame and how the handoff was implemented. Document whether the cube was constraint-driven or animated while held.

DELIVERABLES
- robot-physics.blend and any required cache files.
- One 1920 x 1080 hero PNG.
- A complete 12-second preview at minimum 1280 x 720, MP4 or numbered PNG sequence.
- README.txt.

GENERAL REQUIREMENTS
Create the actual editable Blender project, not only a plan or code listing. Python automation is allowed. Build your own geometry and procedural materials; do not download finished models or substitute generated images for 3D geometry. Use meaningful names and organized collections. Pack required resources, and provide any baked caches using relative paths. State the Blender version and any required add-ons in README.txt. Do not assume paid or separately installed tools are available.

Inspect the rendered result and the saved project. Fix obvious defects before delivery. Include a short README.txt describing how to open and use the file, controls, implementation choices, checks performed and honest limitations. Do not claim that an export or simulation was validated unless it was actually checked. Prioritize a complete coherent result over unnecessary detail.
Low


Medium / Mid


High


Extra


Max


Both sets show the cube pickup, transport and final tray state in their archived animations. Opus Max has more developed surfaces and joint detail; Fable’s setups remain closer to a clean schematic demonstration. The important functional question is the release into physics. Fable’s full saved-cache and release-transform verification remains incomplete.
Fable: Mid has changing black patches on the tray rim and table leg in the sampled animation. Extra crops the upper arm late in the clip; Max keeps the receiving tray cut off at the right. The cube arrives, but the presentation still needs work. These frames don't establish what caused the black patches.
The sampled Opus sequences show pickup, transport and arrival coherently. High tilts its cube near the drop, and Extra briefly hides part of the robot behind the ramp. Max has more developed joints, though the sampled frames do not verify the complete physics handoff.
Character modeling and rigging
Task 7 — VTuber: a skeleton is only the beginning
The brief asks for a complete adult anime character with weighted clothing, hair, articulated fingers, independent blinks, mouth shapes and a twelve-second demo. A skeleton or a changing mouth alone cannot satisfy the required deformation and character quality.
Original brief — Task 7
GLITCH ORCHARD VTUBER — CHARACTER MODEL, RIG AND ANIMATION

Create an original adult anime woman as a full-body 3D VTuber character in Blender. You must MODEL, RIG AND ANIMATE her. A static character, a turntable without character motion, or an unweighted skeleton is not sufficient. The character should look expressive, friendly and slightly mischievous: a host for creative AI experiments.

EXACT CHARACTER DESIGN
Age appearance: clearly adult, approximately mid-20s. Height: approximately 1.65 m, with stylized anime proportions around 6.5 heads tall. Slim-to-average build, natural relaxed posture, modest practical clothing. Warm light-beige skin, softly rounded face, small nose, defined but subtle lips, large expressive eyes and clean dark upper eyelashes.

Palette: white #FFFFFF as the dominant clothing color; neon pink #FF2D95 and electric blue #246BFF as saturated accents; ink #171725 for dark areas. Enter these as sRGB material colors with correct conversion if using code. Lighting may change their rendered appearance. Skin, mouth and metal fasteners may use appropriate natural supporting colors. Do not introduce additional dominant accent colors.

Hair: ink-colored shoulder-length bob with a clean rounded silhouette, layered ends, side-swept bangs and two longer face-framing locks. On the CHARACTER'S LEFT, add one broad neon-pink front streak running from roots to tip. On the CHARACTER'S RIGHT, add a slimmer electric-blue streak. All left/right directions are the character's own anatomical sides, not the viewer's. Add a small original pink plum-shaped hair clip with a blue leaf above her left temple, using simple modeled shapes rather than relying on an external logo file. Keep eyebrows and eyes visible.

Eyes: character's left iris is neon pink; right iris is electric blue. Both have dark pupils, clear highlights and a restrained anime gradient. Create actual eyelid geometry or deformable eyelid surfaces that can fully close over the eyes.

Outfit: a waist-length white bomber jacket, worn open over an ink-colored high-neck top. Jacket has a slightly raised collar, ink cuffs and hem, a pink stripe on the left sleeve and a blue stripe on the right sleeve. Add two slim offset pink/blue bars on the left chest as a subtle glitch motif. Use fitted ink high-waisted shorts reaching mid-thigh, opaque ink tights, and white ankle boots with dark soles. The left boot has a pink accent tab; the right boot has a blue accent tab. Hands are bare and each has five individually articulated fingers. Keep the silhouette readable and avoid loose decorations that make tracking difficult. No text or lettering.

MODEL AND MATERIALS
Build a complete 3D body and outfit with clean, deformation-friendly geometry, suitable edge flow around shoulders, elbows, knees, hips, fingers, mouth and eyes. Clothing may use separate meshes with enough clearance for animation. Build modeled hair clumps with readable layers and dedicated motion bones. Use a consistent attractive cel-shaded/anime look with controlled highlights; do not flatten the character into image planes. Model basic inner-mouth geometry, upper/lower teeth and tongue so open-mouth expressions do not reveal a hollow head. Avoid hidden geometry poking through clothing.

BODY RIG — REQUIRED
- Weighted humanoid skeleton: root, hips, spine, chest, neck, head, clavicles, upper/lower arms, hands, upper/lower legs, feet and toes.
- Individual finger chains with curl controls.
- Usable arm and leg IK controls with pole targets, plus a gaze target.
- Separate controls or bones for bob hair and the two front locks; optional spring motion may be baked for delivery.
- Meaningful bone/control names, sensible hierarchy, clean neutral A-pose and resettable control transforms.
- Skin weights must deform the actual character, clothing and hair appropriately. Do not merely parent rigid limbs to bones.

FACE RIG — REQUIRED
Provide independent left/right blinks, eyebrows, eye aim, jaw opening and mouth shapes. Include clearly named shape keys or equivalent independent facial controls for Neutral, Happy, Angry, Sad, Surprised, Blink_L, Blink_R, A, I, U, E and O. Combine mouth shapes, eye movement and expression without catastrophic clipping. Keep the neutral base mesh usable and symmetric where the design is symmetric. A smile must not depend only on rotating the whole head.

DEMO ANIMATION — REQUIRED
Create 12 seconds at 24 fps (frames 1–288), demonstrating the completed character rig:
Frames 1–48: relaxed standing idle with subtle breathing, a natural blink and eye contact with camera.
Frames 49–120: raise her right arm and wave twice, with a readable shoulder/elbow arc and slight finger movement; smile while waving.
Frames 121–192: lower the arm and turn her head about 20 degrees left and right while gaze remains controlled. Transition from curious/surprised expression to a warm smile. Add restrained hair follow-through without hair crossing the face.
Frames 193–264: animate A, I, U, E and O mouth shapes in a clearly visible short sequence, with subtle head movement and another blink. This is a silent viseme demonstration, not claimed audio synchronization.
Frames 265–288: return to a friendly neutral pose.
Include a full-body render camera and an additional face close-up camera. Keep movement anatomically plausible and feet planted. Do not conceal broken hands or deformations by cropping them out.

VALIDATION
Inspect elbows, shoulders, wrists, finger bends, hips and knees in representative poses, and inspect blinks and open-mouth shapes up close. Verify that clothes remain outside the skin, eyelids close and eyes stay in their sockets. Return the rig to its neutral pose successfully. Provide a short checklist of implemented rig and expression controls.

DELIVERABLES
- glitch-orchard-vtuber.blend containing the complete model, body/face rig, materials, demo action and cameras.
- A 1920 x 1080 full-body beauty PNG and a separate face close-up PNG.
- Front, side and back neutral-pose renders, which may be combined into one character sheet.
- A full 12-second animation preview at minimum 1280 x 720 and an additional face-close-up preview of the same action.
- README.txt with rig instructions, expression/viseme mapping and known limitations.
A runtime-specific VTuber export is optional, not a substitute for the required Blender deliverables. If you provide VRM or another export, name the format/version and validate it by re-importing or loading it. Do not claim live tracking or application compatibility from a working Blender rig alone.

GENERAL REQUIREMENTS
Create the actual editable Blender project, not only a plan or code listing. Python automation is allowed. Build your own geometry and procedural materials; do not download finished models or substitute generated images for 3D geometry. Use meaningful names and organized collections. Pack required resources, and provide any baked caches using relative paths. State the Blender version and any required add-ons in README.txt. Do not assume paid or separately installed tools are available.

Inspect the rendered result and the saved project. Fix obvious defects before delivery. Include a short README.txt describing how to open and use the file, controls, implementation choices, checks performed and honest limitations. Do not claim that an export or simulation was validated unless it was actually checked. Prioritize a complete coherent result over unnecessary detail.
Low


Medium / Mid


High


Extra


Max


The face cameras expose different failures. Opus Low closes its eyes with straight dark bars. In Fable High, the whites move with the face while the irises stay in place. The eye parts visibly slide out of alignment during ordinary movement.


Opus Max is clearly better here: its face, hair and blink are more coherent. Fable Max’s front hair stays in place while the face moves, and its expressions remain harder to read. Low’s waving forearm stretches into a triangular spike. Neither model delivers a character ready to use as a VTuber. The eyes, hair and clothing need to hold together through ordinary movement; these results are still far from that.

Photorealistic production
Task 12 — Energy drink: directing a photorealistic commercial
This is a finished silent fifteen-second advertisement with five specified shots, exact readable packaging, cold surface detail, plausible fruit, ice and liquid, and a stable final packshot. Silence is explicitly allowed. A geometric splash is also allowed if honestly described.
Original brief — Task 12
GLITCH ORCHARD ENERGY — PHOTOREALISTIC PRODUCT COMMERCIAL

Create an original fictional energy-drink brand extension called GLITCH ORCHARD ENERGY and produce a finished 15-second photorealistic commercial in Blender at 24 fps, frames 1–360. This must feel like a deliberately directed beverage advertisement: strong product identity, appetizing tactile details, controlled pacing and a memorable final packshot. It is not merely a rotating can or an exploded view.

PRODUCT AND PACKAGING
Model a slim 330 ml aluminum can approximately 14.5 cm tall and 5.8 cm in diameter. Include a believable rolled top rim, recessed lid, scored opening, ring pull, base concavity and fine manufacturing bevels. Keep the can sealed throughout the spot.

Flavor concept: PLUM + YUZU. The label is predominantly satin white with an ink #171725 wordmark, a bold offset neon-pink #FF2D95 band and a narrower electric-blue #246BFF band. Preserve white as the dominant label area; use the saturated colors as deliberate accents. Add an original small plum-shaped emblem with a leaf and a restrained offset glitch slice. No existing external logo asset is required.

Required readable label text, exactly:
GLITCH ORCHARD
ENERGY
PLUM + YUZU
330 ml

Use an original clean geometric sans-serif layout, with GLITCH ORCHARD largest, ENERGY secondary and the flavor smaller. Build the typography as a high-resolution label texture or suitable surface geometry, correctly wrapped without mirrored text, broken kerning or a visible front seam. Use a font available in the environment and pack it where permitted. No nutrition panel or claims about health, performance, caffeine content or sugar content are required. This is fictional packaging.

ART DIRECTION
Premium, crisp, cold and energetic. Photorealistic aluminum, satin printed ink, tiny condensation beads and subtle brushed metal on the lid. Combine a dark-ink studio environment with large white reflection cards, a restrained pink light on one side and blue light on the other. The label must remain predominantly neutral white and legible, rather than washed entirely in colored light.

Use fresh purple plums, one cut plum with visible flesh and pit, and a cut yellow yuzu as flavor cues. Model plausible fruit shapes and materials. Include a few clear ice pieces on the ground for the final shot, with slight meltwater and natural surface imperfections. Avoid turning the set into a pile of ingredients. All hero props must be three-dimensional.

COMMERCIAL SHOT LIST
Frames 1–60, 2.5 seconds: extreme macro reveal of the cold can surface. A soft reflection sweeps across condensation and a portion of the colored label. Shallow depth of field is appropriate, but at least part of the surface must be tack sharp.
Frames 61–132, 3 seconds: close shot of the lid, rim and ring pull, moving down toward the wordmark. A clean camera move and traveling highlight reveal the manufactured detail. Keep the can sealed.
Frames 133–228, 4 seconds: hero action shot. The can turns slowly in a controlled studio suspension while a small amber beverage splash arcs behind and around its lower half. Fruit elements can move in a restrained choreographed arc with sensible trajectories. Keep the front wordmark readable for a meaningful portion of the shot. No objects may pass through the can.
Frames 229–300, 3 seconds: cut to the can already standing upright on a dark, subtly reflective plinth with fruit and a few ice pieces at its base. Camera gently pushes toward the product; condensation catches the rim light. Do not imply a physical landing unless you actually animate it plausibly.
Frames 301–360, 2.5 seconds: stable final packshot with the whole can visible, readable packaging and ample negative space. Overlay exact copy: 'GLITCH ORCHARD ENERGY' and, below it, 'A little unexpected.' End with a composed frame, not a fade that obscures the product.

SIMULATION AND MOTION
The commercial is judged on photorealism and directing, not fluid-solver choice. The splash may be a real baked liquid simulation or convincingly animated three-dimensional liquid geometry. State which method you used. Give liquid appropriate thickness, irregular edges, droplets and reflections/refraction. Do not use a flat stock splash or claim a procedural mesh is a fluid simulation. Condensation may use instanced geometry; vary bead sizes and density and avoid oversized uniform spheres. Keep rigid can geometry undeformed. Use intentional camera cuts, smooth motion and appropriate motion blur without smearing the typography.

LIGHTING AND RENDERING
Use physically based materials, suitable transmission/refraction and sufficient sampling for stable glass, liquid, condensation and metal. Control highlights and color management. The spot should have consistent exposure and grading across cuts. Preserve surface detail; no excessive bloom, artificial outlines, painterly shading or obvious low-poly edges. Realistic camera optics should support the product rather than conceal defects.

AUDIO
Deliver a polished silent visual commercial; audio is not required and its absence must not be treated as unfinished. Do not add unlicensed music. If optional original audio is added, also deliver the silent version.

VALIDATION
Inspect label readability, macro surface quality, every shot boundary, splash intersections, moving reflections and the final packshot. Check that condensation and liquid do not flicker between frames and the can remains the same design in every shot.

DELIVERABLES
- energy-drink-commercial.blend with editable product, set, materials, camera shots, animation and final text treatment. Use timeline camera markers or an equivalent reproducible shot setup.
- A complete edited 15-second 1920 x 1080 commercial as MP4. If encoding is unavailable, provide the full numbered PNG sequence and assembly instructions.
- A 1920 x 1080 final packshot PNG and one macro-detail PNG.
- Required fluid caches, if a simulation was used.
- README.txt with shot ranges, render instructions, splash method and limitations.

GENERAL REQUIREMENTS
Create the actual editable Blender scene and requested renders, not only a plan or script. Python automation is allowed. Use meaningful names and collections, real-world scale and a reproducible rendering setup. Build the main subject geometry yourself; no downloaded finished scenes or hero models. Licensed material textures and HDRIs are allowed if available: document their sources and licenses, pack permitted dependencies, and provide a procedural fallback if access is unavailable. Do not replace scene geometry with a generated image, projected photograph or finished background plate. Procedural textures and instanced geometry are encouraged.

State the Blender version and render engine. Pack external resources and include necessary caches with relative paths. Inspect saved files and rendered results, fixing obvious errors before delivery. Document controls, how to reproduce outputs, sources, checks and remaining limitations in README.txt. Do not claim deliverables or validation that you did not complete.
Low


v2 · additional pass


v2 · additional pass


Medium / Mid


v2 · additional pass


v2 · additional pass


High


v2 · additional pass


v2 · additional pass


Extra


v2 · additional pass


v2 · additional pass


Max


v2 · additional pass


v2 · additional pass


The close cameras reveal different surface failures. Fable High puts its lettering in front of the cylinder. Opus High’s revised macro keeps the print on the surface, but covers it with dark bead-like condensation. A cleaner label fit does not automatically make the can look cold or photographic.


Now look down at the fruit’s lower edge. Fable Max’s cut plum meets the table in a straight cutoff. Opus Low’s revised fruit and ice have their own problems, with a buried-looking plum and matte gray blocks. These faults survive a more polished set.


The revisions can add surface grain, wetness and reflections while preserving the wrong object shape or contact. That is the limit the close-ups make obvious: more finish around a plum does not lift it out of a table.
Task 13 — Forest cabin: the architectural photograph test
The target is a real-looking woodland photograph after rain, with credible construction, natural vegetation, restrained weathering and three consistent camera views. A stylized diorama is explicitly outside the requested look.
Original brief — Task 13
CABIN IN THE WOODS — PHOTOREALISTIC ENVIRONMENT

Create an original photorealistic woodland cabin scene in Blender. The target is a convincing architectural photograph taken in a real forest, with credible construction, natural vegetation, restrained weathering and carefully observed light. Do not produce a stylized diorama, cartoon forest or fantasy illustration.

SETTING AND MOOD
A small timber cabin sits in a quiet mixed conifer-and-birch forest just after light rain in early autumn. It is late afternoon under a broken overcast sky: soft cool ambient light, a faint warm break in the clouds, and gentle warm interior light visible through the windows. The environment should feel inhabited and peaceful, with small signs of use but no people, animals, vehicles or text.

CABIN
Build a plausible single-storey cabin approximately 6 x 8 m, with a pitched dark standing-seam metal roof, a modest covered wooden porch and three steps leading from a worn path. Use vertical timber siding, proper corner trims, a front door, two generously sized glazed windows, gutters, a downpipe and a modest chimney with believable flashing. Support the porch and cabin on a visible, sensible stone or concrete foundation. Roof, porch posts, steps and walls must connect coherently.

Give the walls and roof thickness, windows actual frames and glass, and doors proper depth. Model roof seams and major boards rather than representing every feature with a flat texture. Weathering should follow exposure and gravity: slight darkening near the base, restrained streaking beneath runoff points and more wear on the steps. Avoid randomly spreading identical dirt over every surface.

Include enough actual interior geometry to make the windows convincing: a small table, chair, warm pendant light and simple wall/floor surfaces. No complete furnished interior is required. Avoid glowing opaque window planes and reflections that imply an impossible interior.

FOREST AND GROUND
Build a scene footprint of roughly 30 x 30 m around the cabin, with enough layered background vegetation to avoid exposing the set boundary. Use an irregular terrain surface, a narrow compacted-earth path, moss, grasses, fallen leaves, twigs, a few stones and exposed roots. Include at least three visibly distinct tree forms with varied size, age, rotation and branching. Use denser background instancing where appropriate. Avoid a uniform grid, repeated identical silhouettes or trees emerging from the porch.

Ground should be damp with a few small shallow puddles in natural depressions. Vary roughness and wetness; do not make the entire forest a polished mirror. Blend soil, leaf litter, roots and moss at plausible scales. Give tree bark and wood grain directionally correct textures. Scatter small plants according to light, paths and available space rather than evenly everywhere.

STORY DETAILS
Add a small stack of split firewood beneath the porch cover, a simple outdoor chair and muddy wear near the entrance. Keep the composition restrained. These details should suggest use without distracting from the architecture.

CAMERA AND COMPOSITION
Main photograph: eye height about 1.5–1.7 m, a natural 35–50 mm full-frame-equivalent field of view, three-quarter view of the cabin, with the path guiding the eye toward the entrance. Use foreground vegetation sparingly for depth while keeping the cabin recognizable. Keep verticals largely vertical and avoid extreme wide-angle distortion. Let the forest frame the building rather than conceal it.

Second photograph: closer porch-side angle showing siding, wet steps, window glass and realistic construction detail.
Third photograph: a wider environmental view showing how the same cabin sits in the surrounding forest. Use the same weather, material state and time of day in all three images.

LIGHT AND MATERIALS
Use realistic indirect light and restrained volumetric atmosphere only if it improves depth. Fog must not hide unfinished geometry or flatten the whole image. Balance warm interior light against cool outdoor light without neon-orange windows. Preserve realistic timber, metal, stone and foliage response. Use subtle imperfections, correct texture scale and enough geometry for convincing silhouettes and contact shadows. Avoid excessive bloom, heavy vignette, crunchy sharpening and overly shallow depth of field.

TECHNICAL REQUIREMENTS
Use efficient instances for vegetation while maintaining variation. Organize cabin, interior, trees, understory, ground, props, lights and cameras in separate collections. Keep the scene navigable and editable. Photorealism must come from geometry, materials, lighting and composition; no photo backdrop or camera-projected finished forest. Animation is not required.

VALIDATION
Inspect at full image resolution: ground contact, roof/wall/porch joins, glass and interior visibility, texture scale, repeated vegetation patterns, shadow noise and obvious intersections. Verify that the scene works from all three required camera positions and not only one flattering view. Fix accidental set boundaries visible in camera.

DELIVERABLES
- cabin-in-the-woods.blend with complete editable environment, cameras and lighting.
- Three 2560 x 1440 PNG renders: main architectural view, porch/material detail and wider environmental view.
- README.txt with render settings, scene organization, material/resource sources, performance choices, checks performed and limitations.

GENERAL REQUIREMENTS
Create the actual editable Blender scene and requested renders, not only a plan or script. Python automation is allowed. Use meaningful names and collections, real-world scale and a reproducible rendering setup. Build the main subject geometry yourself; no downloaded finished scenes or hero models. Licensed material textures and HDRIs are allowed if available: document their sources and licenses, pack permitted dependencies, and provide a procedural fallback if access is unavailable. Do not replace scene geometry with a generated image, projected photograph or finished background plate. Procedural textures and instanced geometry are encouraged.

State the Blender version and render engine. Pack external resources and include necessary caches with relative paths. Inspect saved files and rendered results, fixing obvious errors before delivery. Document controls, how to reproduce outputs, sources, checks and remaining limitations in README.txt. Do not claim deliverables or validation that you did not complete.
Low

v2 · additional pass


v2 · additional pass

Medium / Mid

v2 · additional pass


v2 · additional pass

High

v2 · additional pass


v2 · additional pass

Extra

v2 · additional pass


v2 · additional pass

Max

v2 · additional pass


v2 · additional pass

Start with the complete forest scenes. Opus Extra puts its cabin in darker woodland, with warm light at the windows. Fable Extra gives the building a brighter, warmer presence. The forest depth, light and framing belong to these full views. Move to the porch details to judge the boards and firewood.


The porch details put a limit on the attractive forest images. Opus Extra has a much stronger sense of place than the lower settings, but its boards and stacked wood remain very regular. Fable Extra’s warmer scene still exposes faceted log ends and sharp repeated foliage when the camera moves closer.


Neither close view meets the requested photographic finish. Fable’s material revision keeps the underlying log and plant shapes, while Opus’s stronger atmosphere still contains conspicuous repetition. The wider image and the closer camera answer different parts of the brief.
What stands out in these two batches
| Area | What the side-by-side outputs show |
|---|---|
| Trees | Extra can be appealing in both families; Fable Max has the severe tubular-branch regression. |
| Characters | Opus Extra/Max have more coherent face and hair modeling; Fable retains pronounced design and deformation defects. |
| Cloth and environments | Opus higher-setting images generally have more developed fabric, vegetation and scene detail. |
| Mechanical products | Fable has credible stronger examples; individual controls and presentation still need separate checks. |
| Setting changes | Neither series improves uniformly, but Fable feels markedly less consistent to me in this set. |
What changes in the next test
The workflow review was added later, after differences in the models’ use of visual feedback emerged during the Blender tests. From the next run onward, every model and setting will log the images viewed, the changes made and the final visual check.
Where this leaves the comparison
For these batches, Opus feels more consistent to me at turning the detailed brief into a coherent 3D image. Fable can deliver attractive scenes and useful mechanisms, but several setting changes produce a worse visual result. The tree is the clearest case of Max going backwards from Extra.
Source reviews
The Opus 5.5 review covers its thirteen tasks and scoring method. This comparison also includes all five Fable settings and both models’ commercial and cabin revisions.